
When onboarding macOS with Apple Business Manager and Intune, there are a few important security considerations to keep in mind. Specifically, it’s crucial to control the level of access each user has on a device, and this includes the potential issue of local users obtaining administrator rights.
When a local user has administrator rights, they have the power to change settings, install software, and alter other user accounts. In a business environment, it’s usually not desirable for each user to have this level of control, particularly in a context where data protection, malware prevention, and consistent user experiences are key.
I have earlier mentioned Admin by Request from Fasttrack – which is a very powerfull Just-in-time priviledge tool.
When you are onboarding macOS with Apple Business Manager and Intune, you can certainly integrate Admin By Request to enhance your security measures. This tool provides several advantages:
- Just-In-Time Access: With Admin By Request, users can be granted temporary admin rights when necessary, but they don’t have full-time admin access. This mitigates the risk of malicious or inadvertent changes being made to system settings.
- Auditing and Tracking: Admin By Request provides a detailed audit log of all actions taken by users with administrative privileges. This gives you the ability to review and monitor how administrative rights are being used in your organization, providing an extra layer of accountability.
- Approvals: The tool offers the possibility of setting up an approval process. This means that when a user requests admin rights, the request can be reviewed and approved (or denied) by an IT administrator. This can be done either manually for each request or you can set up rules for automatic approval.
- Security Compliance: By limiting user privileges and closely monitoring the use of admin rights, Admin By Request can help your organization to comply with security regulations and standards, such as GDPR, ISO 27001, and Cyber Essentials.
1. Setup freeplan tenant
You can setup a freeplan tenant with 25 licenses – which is a great idea to actually test the solution. The freeplan dont have any deadline. LINK
2. Setup Azure AD Connector
A new and very important feature for Admin by Request on MacOS is support for Azure AD groups. We will get back to details on how it looks.

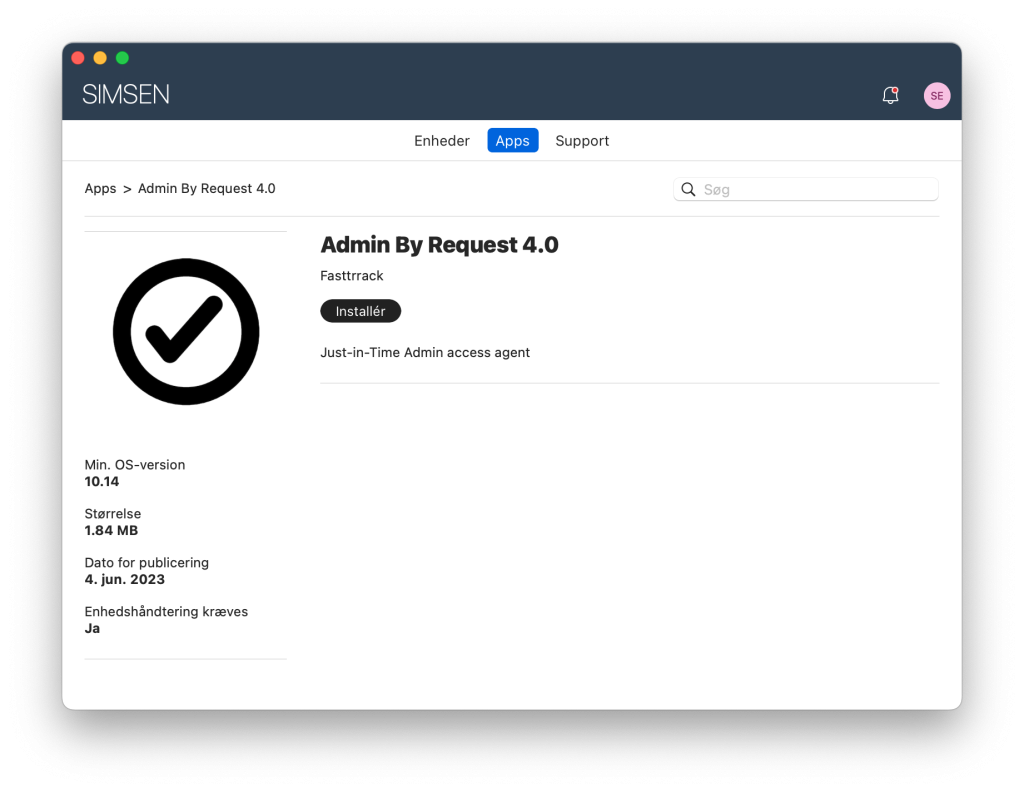
3. Download Admin by Request agent
Go to download – and get the Client for Mac.

When click Download – the agent will be created for your tenant. So no special parameters or login after. This package is for YOUR tenant.

4. Prepare Admin by Request – Mac Global Settings
| When login to Admin by Request admin portal Go to: Settings. From settings – you can see: Windows Settings – Global Windows settings Windows Sub Settings – Settings assigned to a group Mac Settings – Global Mac setting Mac Sub Setting – Settings assigned to a group Global settings – is like fallback, if no sub settings is matching |  |
Set Global Mac settings
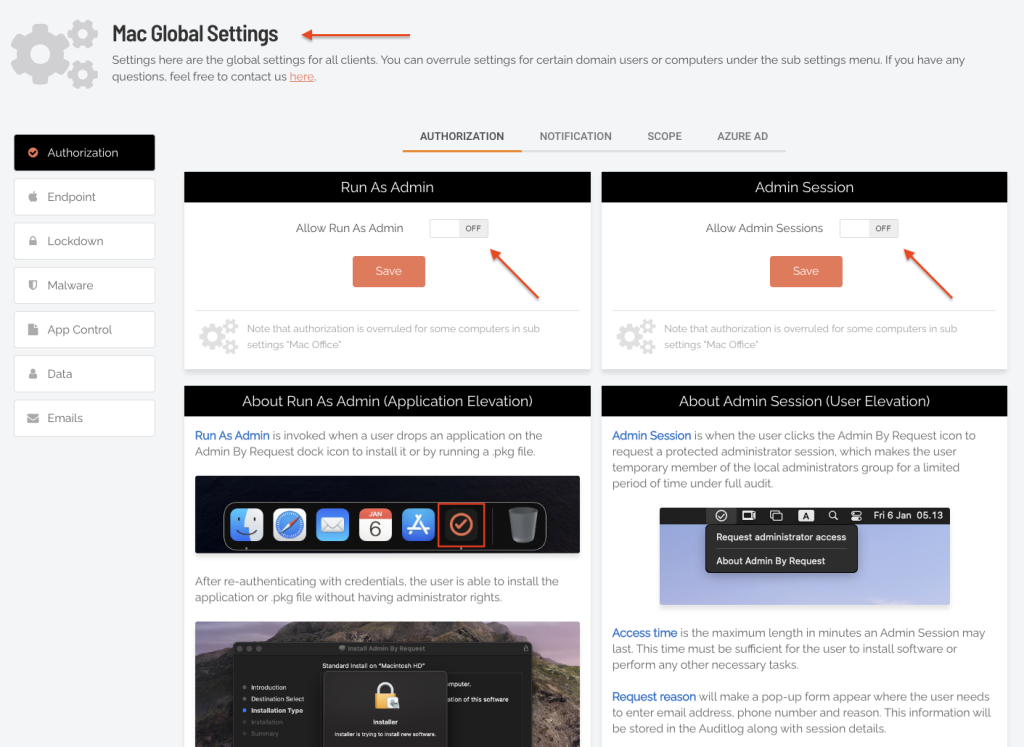

When Admin by Request is installed – it will not have any effect.
5. Prepare Admin by Request app in Intune
Install from Intune as a Line-of-business app
Go to: https://intune.microsoft.com > Apps > MacOS > + Add > Line-of-business app.
I will then assign the app to All devices with a filter or a specific Azure AD group.

Install from Shell script
If you onboard your Mac from Apple Business Manager – and want to have Admin by Request installed as soon as possible. I recommend use Shell scripts – as this is much faster. Link to Github
6. Install Admin by Request from Company Portal and verify
Admin by Request now show up in Company Portal.
After Installation – Admin by Request will show in tool menu (Upper-right-corner)
When the icon is RED – user is still local administrator all the time and Admin by Request policy is not enforced yet.
This is because we set our Global Mac settings to NOT revoke Admin rights.

7. Create Admin by Request policies
Now we will create a Mac sub setting that target our Mac.

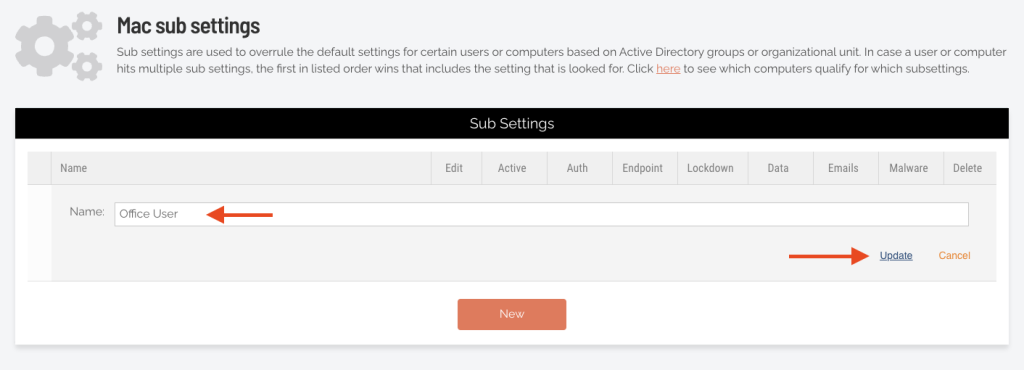


Insert Azure AD group (Remember to add the mac to this group)
Click Save

Set it to Overrule global settings
Activate as showed and click Save
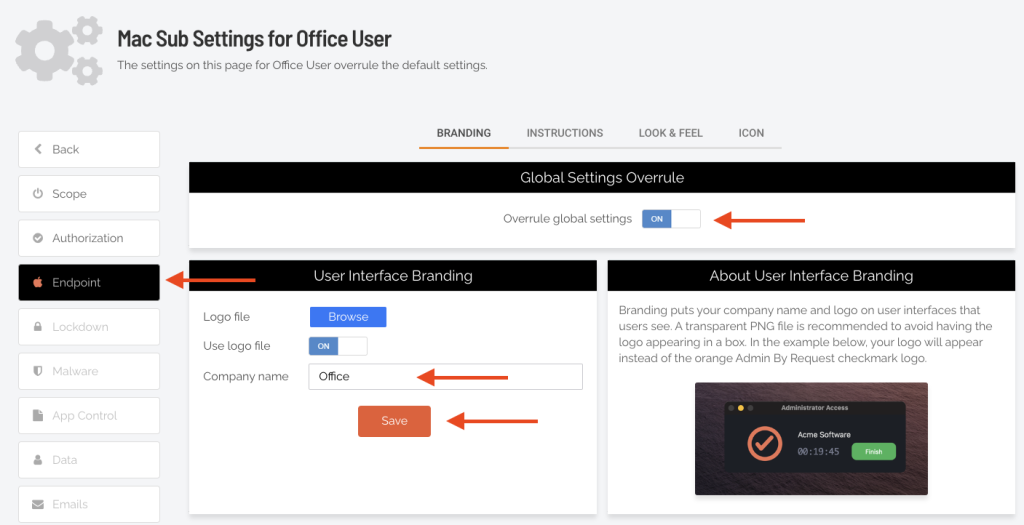
Set it to Overrule global settings
I recommend to set policy name as Company name.(Will show later why)

Set it to Overrule global settings
Set Revoke admin rights to On

Consider if you want to enable this – user will be able to uninstall Admin by Request agent
8. Now check Admin by Request agent on the Mac


Under the logo – you can also see it is the name of the sub-setting: Office
Normally it would be Company name.
When you have multiple profiles and need to troubleshoot this is handy.


9. Full audit
From the Admin by Request admin portal – we now have full audit of what has been installed.
